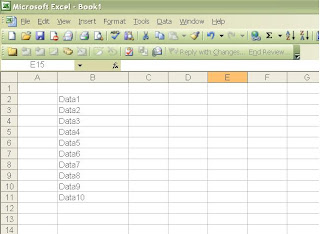
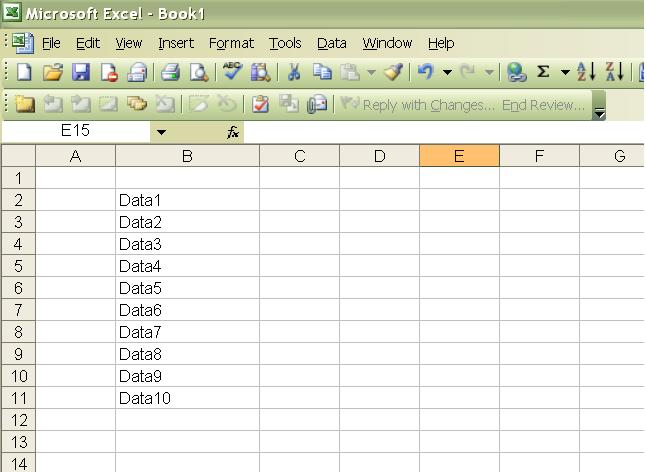
Let’s suppose we have some data in rows like:-
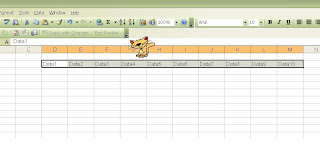

Now, we want to change it into columns, like:-

MS-Excel
Excel – Transpose Data
Moving the data manually, one item at a time, would be a tedious process when we have large volume of data. To save time, we can use the Paste Special command to quickly transpose a column of data to a row of data, or vice versa.
We need to follow the following steps:-
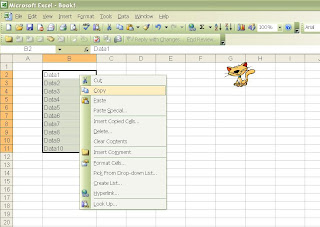
- Copy the data in one or more columns or rows.

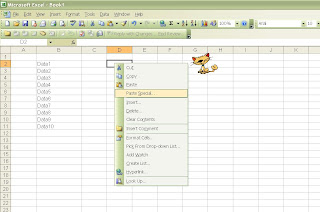
2. Right-click your first destination cell (the first cell of the row or column into which we want to paste our data), and then click Paste Special.
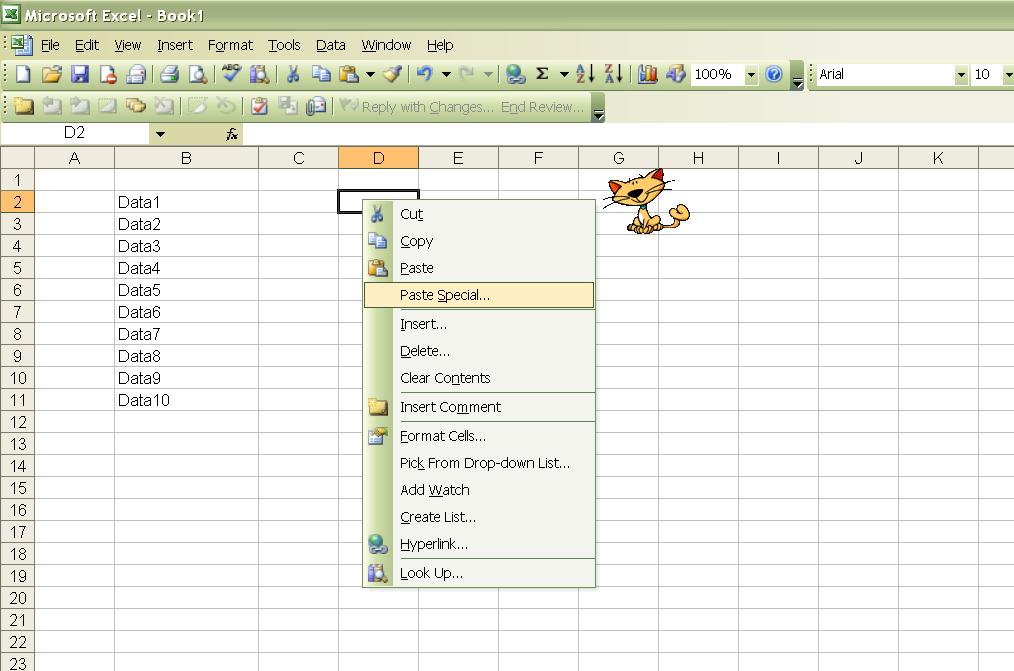
3. In the Paste Special dialog box, select Transpose, and then click OK.
We’ll find the Transpose check box in the lower-right corner of the dialog box:

4. Starting with our first cell, Excel pastes the data into a row or column.

There are few points to be noted here:-
- Columns and rows can not overlap. For example, if we select values in Column C, and try to paste them into a row that overlaps Column C, Excel displays an error message. When we go to paste a column or row, the destination area must be outside of the original values.
- If we copy and paste data from more than one column, Excel places the data from the leftmost column on top. For example, say we copy data from columns A and B of a worksheet, and we paste the data into another worksheet starting at row 1. Excel places the data from column A in row 1, column B in row 2, and so on.
- If we don’t see the Paste Special command, make sure you right-click the first destination cell. We’ll also find the command on the Edit menu. If westill don’t see the command, make sure we’re using Excel 2000 or later.